
I’ll be writing a series of posts that detail my processes and methods of making an animated shot of a character action. The example we’ll be using is Scary the Legendary.
The first step to animating a character is to of course, design the character so that it can be animated in a mechanically effective way. Here is my process of character designing.
I am really bad at drawing people, so I start with photo references from stock image websites. I find a model that has multiple angles of their faces so that I can draw 3 different views of the character; FRONT, QUARTER and SIDE.
Ideally there are more views involved in productions, or an interpolated turnaround model that has all 360 degrees. But I don’t have that kind of time or patience working on my own, so I stick with 3.
In case you couldn’t tell, Scary Busey is loosely based on the real-life actor Gary Busey. So, it was easy enough to find multiple angles of his face to draw the model.
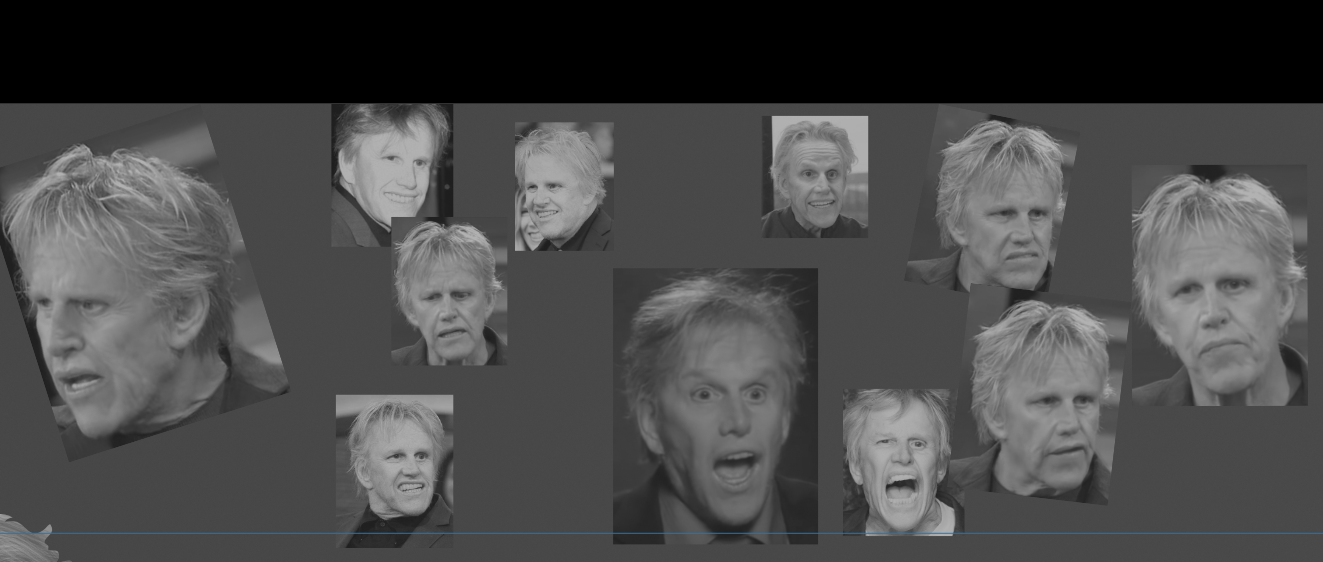
So when I die, whoever looks through my files: this is the context for my Busey photo collection.

I use an iPad Pro 11” 2019 with an Apple Pencil 2.0 to draw the characters directly over the references to make things as easy as possible. It works perfectly. The software I use is Affinity Design by Serif, a Vector Illustration program. I started with Graphic, which was pretty outdated and buggy. Then I moved onto Vectornator, which was great for a while but would crash on complex documents. Affinity is a great replacement if you are ever looking for a replacement image design software that isn’t by Adobe. I use vector graphics so that I can edit and tweak the paths after the fact really easily or export them into a bitmap image editor for finer details if needed.
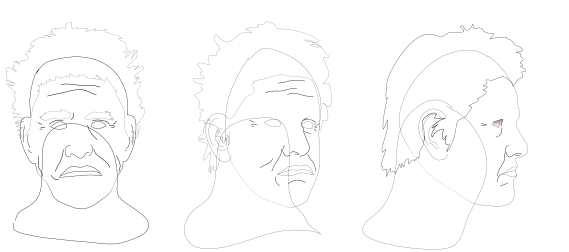
So here we have the outlined features of Scary Busey. Absolutely terrifying, more than usual. One might call it… Scary.
Fun Fact: I played the movie Under Siege at least 5 times in a row in the background of working on Scary Busey’s character model, and Point Break about 3. I don’t remember most of them.
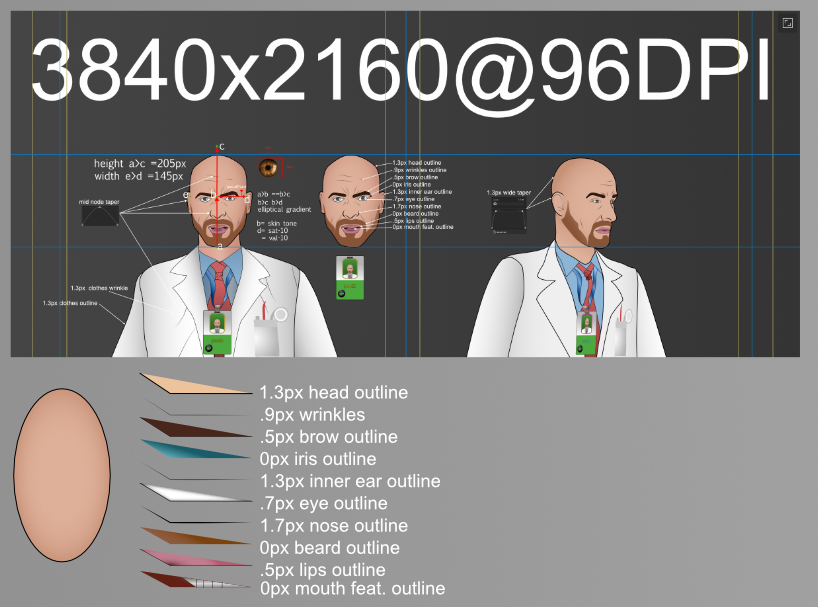
Art productions should have some standards between all characters, I define them as “styles” in Affinity Design. The face outline has a certain thickness that is different than the lines of the inner ear contours. The skin uses a gradient that offsets the saturation and tint a certain distance from the center from the center of the nose. The document is a specific pixel density that is consistent across the project. There are a lot of specific things to pay attention to when working through the whole process.
Thankfully Affinity allows saving and exporting style collections so once the outlines are drawn, I just assign them and fine tune. James, the Russian scientist was my reference model that defined the standard look.
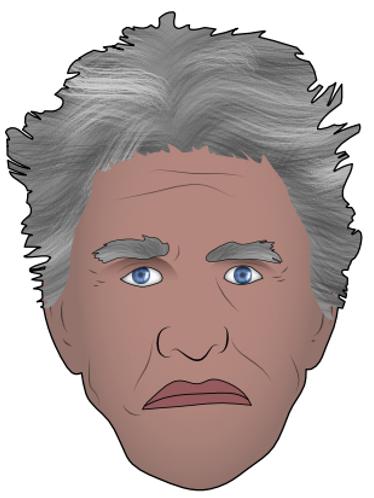
I want a Scary Busey, however not too scary. So, we fill in some skin tones and apply some style presets I made for the features, and it starts to already come to life. In my character design I was aiming for just the right amount of uncanny valley. There are realistic irises and a bit of gradients on extremities to imply sloppy depth. The shoes are a little too detailed but also very indicative of personality. Mouths that have teeth and lips. I defined these styles once I was happy with the look before making final character models.
Lookin’ good Scary. But we are far from done.
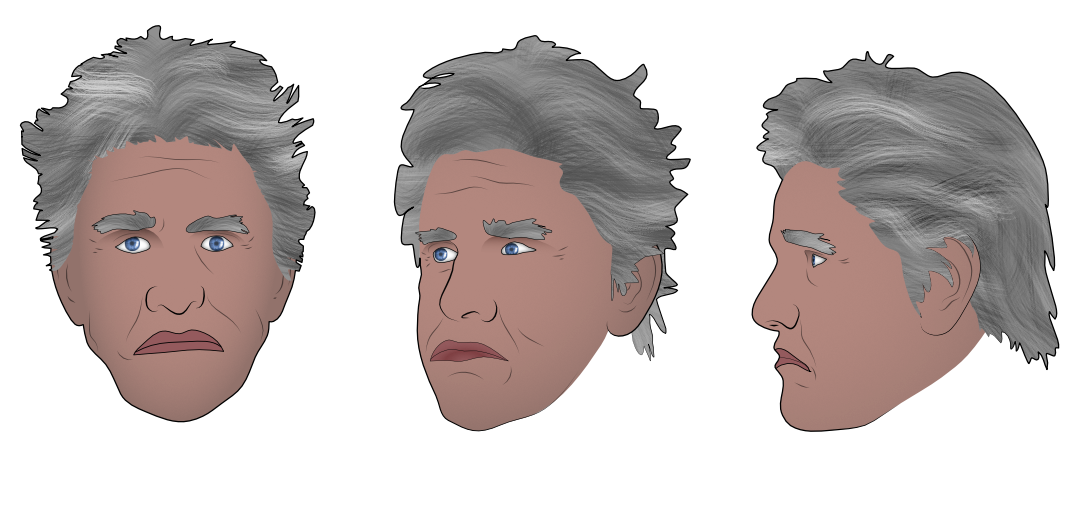
That’s more like it. I still have a lot to learn about character face design, mostly regarding how to draw a side view face in less than 3 hours. It was stupid hard to think about the amount of facial muscles and bone and skin involved that create different wrinkles and shapes depending on the view. It was also tricky to decide the size of the eyes. I could make them realistic and small, but expressions would be harder to read. But making them larger sent them into a kind of slapstick area of unrealistic, and that might be too scary for Scary. Anyways…
Continuing the construction of the character, we move to the body.
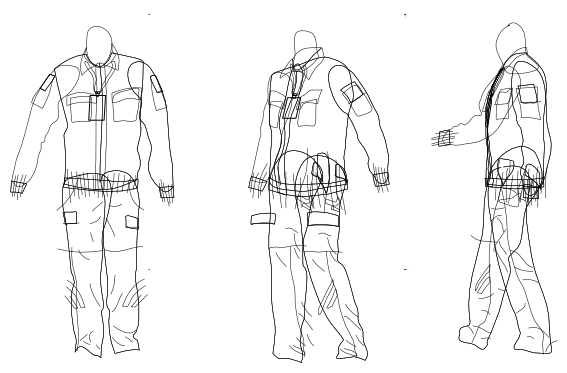
Blah, blah, blah, get a reference custodial image set, draw the lines, nest the shapes, apply the styles, make some shoes and…
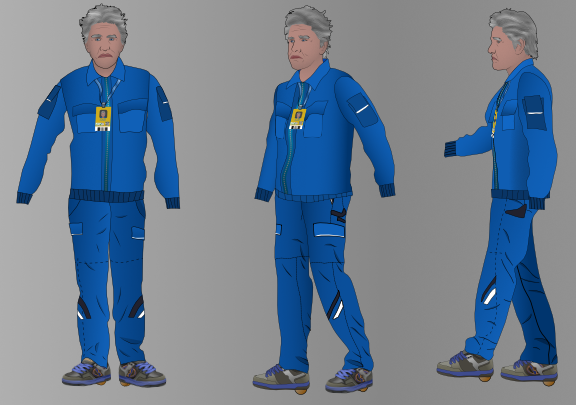
Were getting closer to having a version of Gary Busey that is much less comfortable to look at than the real life one. Isn’t that great!? But we need to prepare for when Scary evolves; many mouths to communicate, and many eye shapes, that both need the 3 angles.
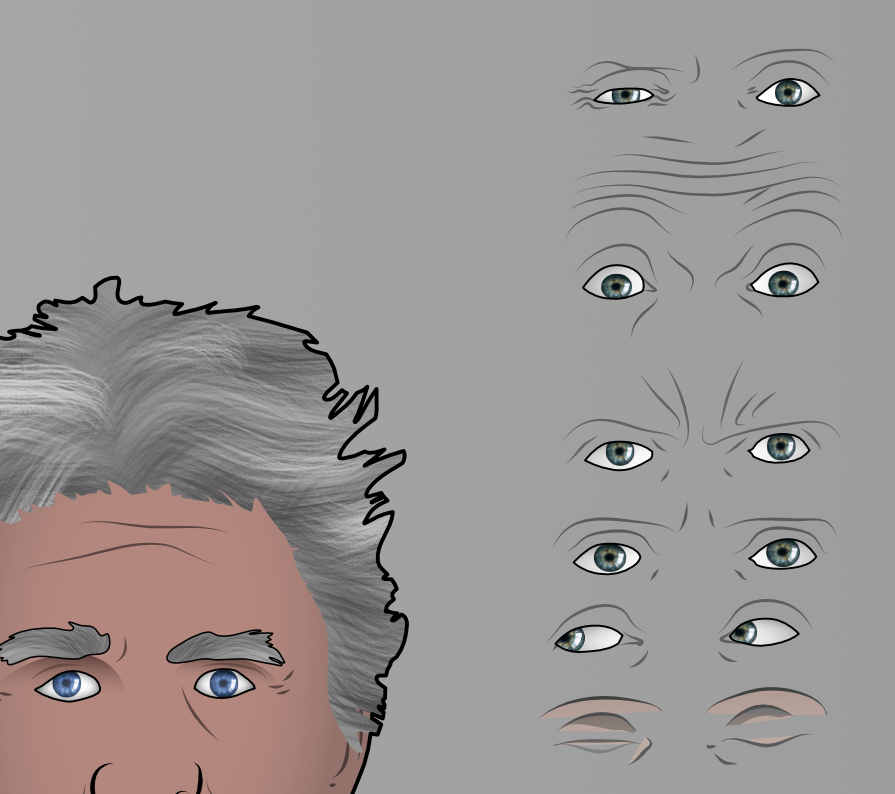
All of the eye expressions will be stored in an “eyeWhite” element that can switch between eye shapes. The element will be set to cut out any part of the irises where the selected shape is not white. Resulting in an easily expandable system for the iris to float around freely without peeling off of the eyeball.
Scary and friends will eventually need to talk to each other and will need many mouths for the sounds they will be producing. Specifically- ABCDEFG and X mouths. At least that’s what they are called in Toon Boom Harmony, pretty much the industry standard, and the animation program I use.
Coming from the TB Harmony Manual:
“The letters assigned to these mouth shapes are standard identifiers, they do NOT correspond to the sound they are meant to produce.”
This is an approximation of the English phonemes each mouth shape can be used to represent:
- A: m, b, p, h
- B: s, d, j, i, k, t
- C: e, a
- D: A, E
- E: o
- F: u, oo
- G: f, ph
- X: Silence, undetermined sound
Each mouth shape looks like what you would expect when you hear the character say words because there is one for each phoneme, or at least an approximation. I drew many more than that for variety and practice to better understand the face.
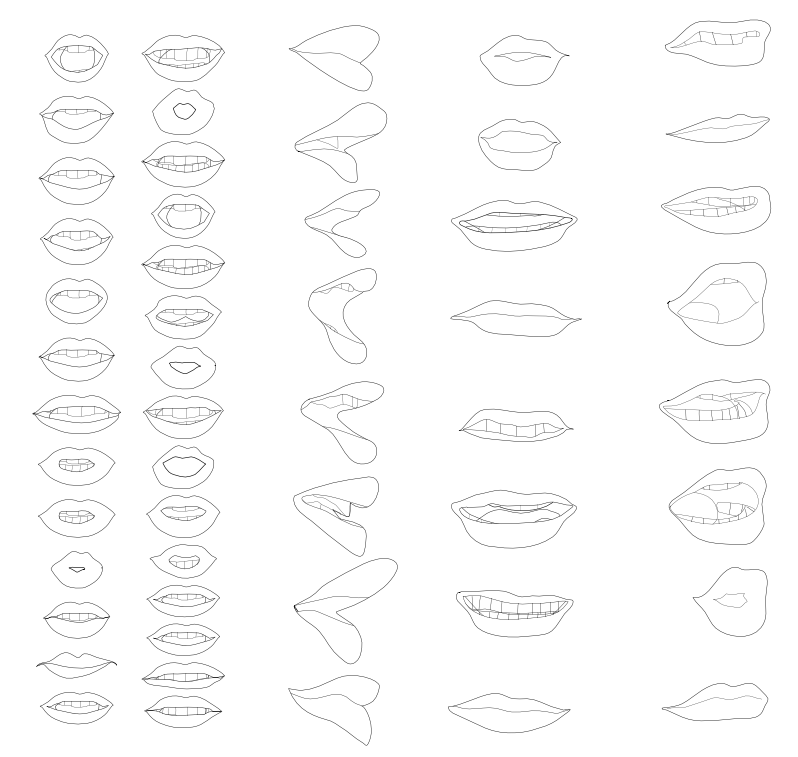
Order of mouths are not aligned correctly in the figure.
If you are a vocalist or familiar with singing, you may notice these are almost the same shapes you make to maximize tonal potential when singing vowels.
Three drawings for each mouth shape for the 3 views of the character. 4 Layers per drawing; dark inside of mouth, tongue, teeth, and lips. The lips and tongue change shape while the teeth only change position, both over the dark inside to imply a cavity. I only use the layers separately to pose them and they are combined when exported as just one drawing rather than having them always move independently. But that might have allowed more flexibility.
Rapidly switching between these mouths over an audio clip of someone talking is called Lip Syncing. This is done automatically in the program unless you have a lot of time to manually assign the shapes and listen carefully.
A few vowels and making faces are only the surface of expression. Scary will also physically interact with things and manipulate objects, same way the real Gary Busey does; telekinesis. And probably hands. So, let’s also draw those.
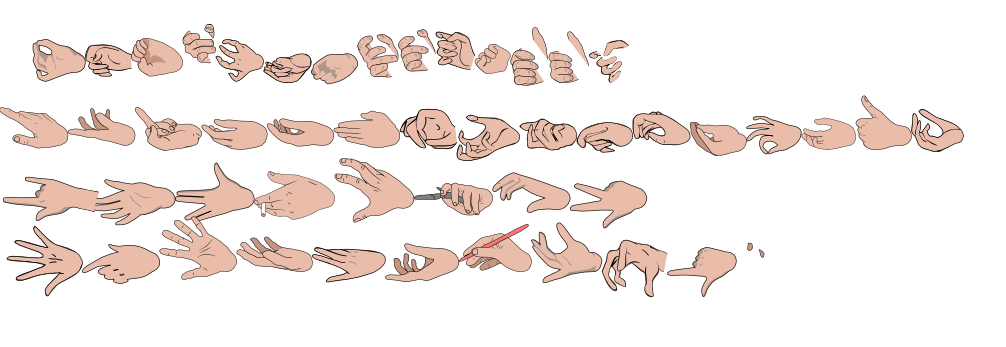
Hands with synchronized over and under layers so that fingers will wrap around objects that are grasped. As a bonus, Scary will also be able to play the banjo with accurate fingering. Will anyone care? Does the real Gary play the banjo? Was it worth the time? Good questions. I don’t know. Why don’t you ask the completed character design of Scary Busey;

He says he doesn’t know either. His posture and hands are also very confused; until we rig him up to a skeleton.
And here we are, step one of creating Gary Busey scenario of your dreams, because isn’t that what we all want?
Thank you for reading and Stay tuned for step 2. See you then!